Fridrich method (modified)
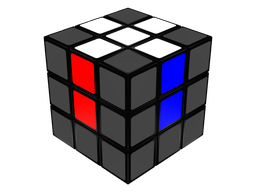
2. Placing of the first layer corners
3. Placing of the second layer edges
4. Preparation of the last layer
This method is called Fridrich Method, and also CFOP, because of the four parts this method can be divided into:
-
Cross: Make a cross in a face and match the edges that form it with the center pieces of the faces next to the
cross.
- F2L: First Two Layers. The aim is to complete two layers of the cube: the one containing the cross and the one placed below. This step is divided into two parts:
-
- Placing the first layer corners
- Placing the second layer corners
-
OLL: Orientation of the Last Layer. We have to make the face opposite to the cross contain just one colour. This step
will be divided into two parts:
-
- Preparation of the last layer
- Complete orientation of the last layer
This subdivision does not come from the Fririch method, but it allows to learn less algorithms. This will be explain clearly later.
- PLL: Permutation of the Last Layer. This part is to change the position (permutation) of the pieces of the last layer, without rotating them. Then the cube would be solved. This step is also divided into two parts:
-
- Permutation of edges
- Permutation of corners
To sum up, from four steps (C, F2L, OLL, PLL) we get seven parts the method is subdivided into:
Table 1: Parts of the method
1
Cross
2
Placing of the first layer corners
3
Placing of the second layer edges
4
Preparation of the last layer
5
Complete orientation of the last layer
6
Permutation of edges
7
Permutation of corners
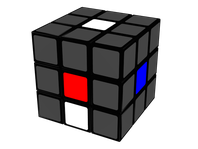
As an example to illustrate these explanations, the white face has been chosen to be solved first, and the yellow face will be the last one. However, this can be applied to no matter what couple of opposite colours of the cube.
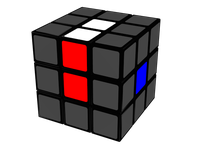
Here, the aim is to get a cross in a face, considered as the upper face, and to match the colour of the cross edges with the colour of the center pieces placed in the middle layer (Figure 1).
The steps are the following:
-
Move the whole cube so that de white center is on the top of the cube.
-
We have to find a edge with white-coloured sticker. This piece will contains another colour. We will bear in mind this
colour for future steps.
-
By turning the layer this edge belongs to, place it in the lower part of the cube.
-
Turn the lower layer of the cube (now containig the edge) until the edge is positioned in the face of the same colour
of that one we paid attention before.
-
There are two possibilities (Table 2):
-
- If the white sticker is vertical (is not on the lower part of the cube), then the movement is: DRF'
- If the white sticker is horizontal (is on the lower part of the cube), then the movement is: F2
- Repeat with all the edges containing a white sticker (we recommend to find next the edge placed on the left or on the right in the solved cube; the process will be easier).
Table 2: Posibilities while making the cross
Starting situation
Moves
Final situation
DRF'

F2